
Published in the February 2015 issue of “Die Porsche Kassette”
I have not found a better automotive leather upholstery than Porsche’s; at least not better in longevity and wear.
Having said that, after having owned my car for 17 years and after having rested my big, fat behind on the driver’s seat for over one quarter of a million miles (250,000) the leather was, to say the least, a bit tired.
Going the route of re-upholstering with new leather would have cost several thousand dollars and, as usual I wanted to keep it on a small budget.
Replacing the seats was an option. One can purchase used seats from any Porsche dismantler at relatively affordable prices, but then one must deal with shipping, removing, installing, etc. Most of the time these used seats are also somewhat tired, especially on the driver’s left bolster which takes the most abuse when one gets in and out of the vehicle.
Also, because I had had my vehicle for so long I though that a change in scenery would be welcomed.
I had ordered my car in Graphite Grey with the full leather interior and with some carbon fibre accents, such as the steering wheel, the shifter and the handbrake.
So when I took a good look at my interior I knew I wanted some change.
I did some research and found several places that sold leather restoration products.
After calling them and speaking with the customer service departments I decided on LeatherMagic.com.
I ordered some materials: a Restoration Kit for Graphite Grey leather (yes, they have Porsche interior colors by their actual name) and a (black) Dye Kit for leather.
I have also used Leatherique.com products as well.
When the kit arrived, I followed the instructions, which were to clean and prep the leather.
You can clean leather seats with warm water and mild soap and a sponge. You’ll be surprised at how much dirt comes out. Do this several times rubbing gently. Finish with a clean water rinse with a towel to remove any soap remnants.
Once the seats have dried you can apply the supplied leather-prep solution. If the leather is creased or shows cracks you can sand it down to correct the imperfection and then the new dye is applied. The correct grit sandpaper is provided in the kit.
The dye can be applied with either a soft-sponge brush or using their aerosol adapter that allows you to spray-on the new dye for a very uniform finish.
Because I wanted to change some of the leather color I had to do some masking as well. I had decided to do a two-tone interior by dyeing some of the leather panels in black and restoring the graphite gray in the others.
Here are some of the before and after images:
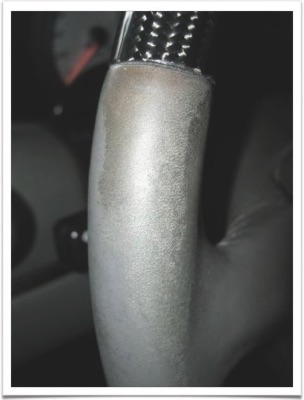
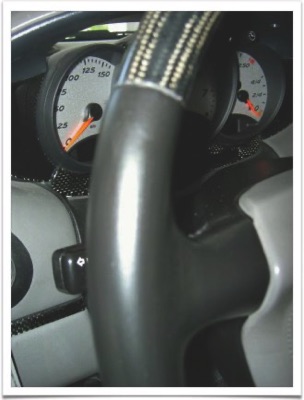
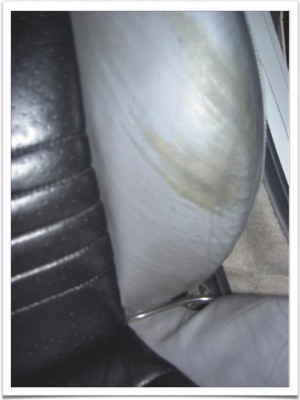
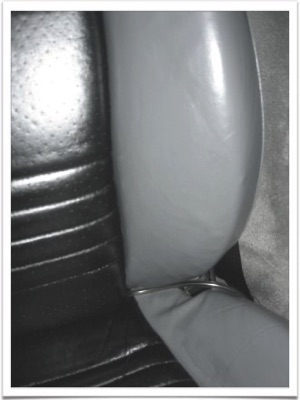
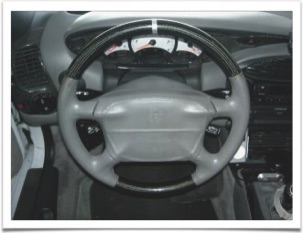
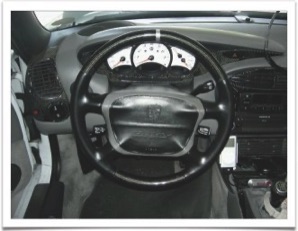
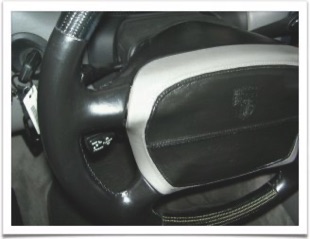
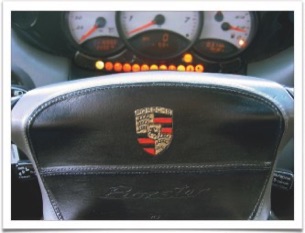
I liked the way the steering wheel turned out so I hand painted the embossed crest in red and gold using Testors model airplane paint (Gold and Guards Red).
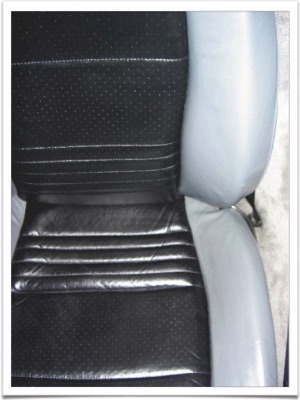
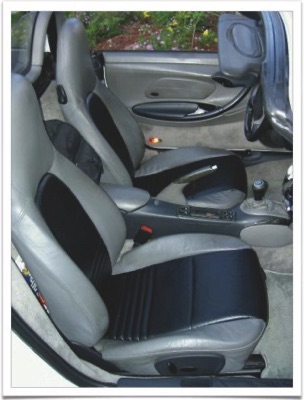
It really is quite simple to update your Porsche’s interior whether it’s leather or vinyl. There are also products to re-dye faded carpets and other cloth material.
Don’t be afraid to do it yourself!
For more information on leather restoration and more, please visit my website: www PedrosGarage.com.
Happy Porsche’ing,
Ⓒ2014 Technolab / PedrosGarage.com


