


Published in the September 2015 issue of “Die Porsche Kassette”
There are two terms that sometimes are used synonymously, but which are not: Bleeding and Flushing the Brakes.
Bleeding the brakes is a quick procedure to remove any unwanted air (water vapor) bubbles from the calipers and lines using a small amount of fluid.
Flushing the Brakes refers to replacing the entirety of the fluid with fresh brake fluid.
Porsche recommends flushing the brake/clutch hydraulic system every two years.
Why? you ask, since you don’t drive your car that much?
Brake fluid is very hygroscopic, meaning that it absorbs water.
It will absorb water molecules from the ambient through the flexible brake lines and through the plastic walls of the fluid reservoir!
Brake fluid boils at around 400°F but water boils at 212°F, so once water gets to the calipers as soon as the calipers get up to 212°F it will boil the water and will release water vapor bubbles, which contrary to liquid, will allow to be compressed, thus altering the effectiveness of the brakes. It makes your brakes feel mushy and soft.
A quick bleed is fine at the track, between sessions, but I personally flush my brakes right before each and every track day, even if I have back-to-back track days. Also, once you open a new can of brake fluid you need to use it all, or it will go bad very quickly, so why not flush instead of bleed?
Before blue-dyed (racing) brake fluid was outlawed, I liked alternating the brake fluid color every time I flushed the system. This made it very apparent to see when the old fluid had been replaced with the new fluid, as the color changed from blue to gold or vice versa.
Now, since all brake fluid MUST be gold, it’s very difficult to see when the new fluid is flowing out from the caliper, so I made myself a graduated container to tell me when fresh fluid was coming out of the calipers.
Here’s how you can make one yourself.
Start with a clean PET or PETE (PolyEthyline Terephthalate) plastic bottle that will hold at least 1 liter (1000 mL) or 1 qt. of liquid.
PET is a crystal-clear plastic generally used in water bottles or food-product bottles which stands up well with brake fluid.
I used an empty ketchup bottle. I guess they now have 58 varieties ;)
With the bottle empty:
1.- Clearly label it BRAKE FLUID
2.- Measure and pour 350 mL of water and mark
that level with a marker.
Label it Right Rear (RR)
3.- Measure and pour another 150 mL of water
(500 cumulative) and mark it.
Label it Left Rear (LR)
4.- Measure and pour another 250 mL of water
(650 cumulative) and mark it.
Label it Right Front (RF)
5.- Measure and pour another 100 mL of water
(750 cumulative) and mark it.
Label it Left Front (LF)
6.- Measure and pour another 100 mL of water
(1,000 cumulative) and mark it.
Label it 1 liter
7.- Empty the bottle. It’s now ready for use.

The tools and materials needed are:
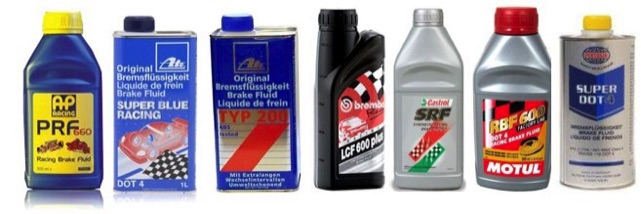
• 1 Liter can of Brake Fluid. DOT 4 is what goes into our Porsches.
You have a choice of several very good products such as: Ate, AP Racing,
Brembo, Castrol, Motul, Pentosin, etc.
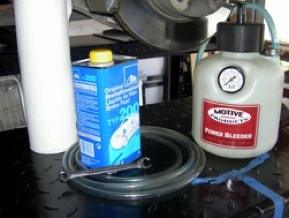
•Power Bleeder
(vacuum bleeders not recommended)
• Collection (graduated) bottle and clear tubes
• 11 mm open-end wrench
• Lift, or hydraulic jack and set of sturdy stands
• Lug wrench (and security socket if used)
• Light source to work in wheel wells
• Paper towels or rags for quick pick up of spills
• Piece of 2” x 4” lumber for clutch bleeding
(for manual transmission cars)
Note: The photos and instructions shown bellow are for early-production 986 but all of the water-cooled Porsches are very similar in this regard, even the trucks (Cayennes and Macans).
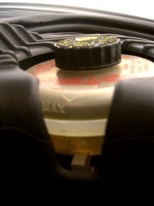
The Brake Fluid Reservoir is located in the front trunk, on the driver’s side.
You can lift the four wheels off the ground and remove them (my preference) or you can remove them one at a time (more time consuming).
Start with the furthest wheel from the reservoir first and then work towards the closest. the recommended sequence is:
1.- Right Rear
2.- Left Rear
3- Right Front
4.- Left Front
5.- Clutch Master Cylinder (for manual transmission cars).
The procedure is the same for each wheel.
Choose the Brake Fluid to use and empty a newly opened 1 liter can into the Power Bleeder.
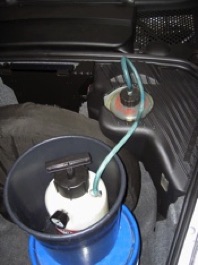
Raise the bucket off the trunk’s floor by placing it on another bucket or cardboard box to make sure that the hose that connects the Power Bleeder to the reservoir is not kinked. Raising it also gives you better access to the pump.
I like to place the
Power Bleeder inside
a bucket. In case of
any leaks or spills, the
bucket will serve as a
secondary containment
vessel, which can avoid possible damage to your car as Brake Fluid can damage paint.
Pump up the pressure in the Power Bleeder to 20 psi.
Starting with the right rear:
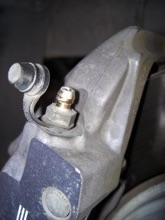
1.- Uncap both caliper nipples
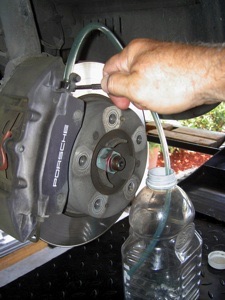
2.- Connect a clear hose to the
inside nipple and route the
other end to the clear,
graduated plastic bottle for
collection.
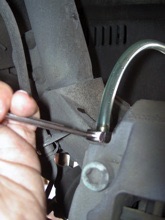
3.- Using the 11 mm wrench
slowly turn the nipple (CCW)
4.- Observe the fluid coming out
5.- Once you have collected the
recommended amount, close
the nipple by turning clockwise.
This does not have to be too
tight but make sure it’s closed.
6.- Move the tube to the outer nipple
on the same caliper and repeat
the procedure. Note that the time
for new fluid to flow is greatly
reduced, as it only has to flow
from the inner part of the caliper
to the outer part. Five seconds or
so is enough.
Now you can repeat the same procedure on the other three calipers.
Periodically, check the Power Bleeder’s pressure and pump back to 20 psi when the flow gets reduced.
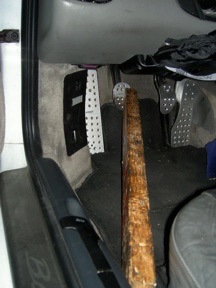
For manual transmission cars, before
you start bleeding the clutch, you need
to completely depress the clutch pedal,
to open the master cylinder. The pedal
needs to be depressed for the entire
clutch bleeding operation.
Either have an assistant depress the
pedal, or cut a piece of two-by-four (2”x4”)
lumber so that it can be wedged between
the depressed clutch pedal and the seat
rail, as shown.
When finished bleeding the clutch you will need to manually pull back the clutch pedal, as it will not initially return on its own, when you remove the lumber or the assistant’s foot.
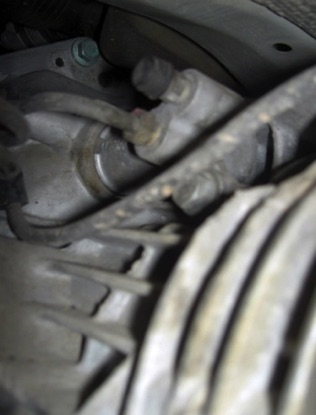
Bleeding the clutch is the toughest part of the procedure because the bleed nipple is difficult to get to comfortably. It is located on top of the transmission, on the driver’s side and has a black plastic cap to protect the bleed nipple from dirt.
Make sure to let the car cool down completely because your arm could get easily burnt if not.
Once you locate it, you’ll have to:
1.- Place the 11 mm wrench on the
nipple (here the closed end
works better) then insert one end
of a (longer) clear drain hose
onto the nipple and the other end
into the graduated collection
bottle.
2.- Slowly open (CCW) the nipple and let the system flush to the
recommended volume.
3.- Tighten the bleed nipple, remove the drain hose and recap.
4.- Slowly let off the pressure on the Power Bleeder by unscrewing the pump.
5.- Check to make sure that the Brake Fluid level in the reservoir is at the MAX
indicator, with the car level.
Make sure you clean up any Brake Fluid spills because it can damage paint and is corrosive. Brake Fluid will wash off with water from hands, tools or clothes and can be neutralized with water.
Don’t forget to do this every two (2) years of before every DE or track day.
For additional information on Brake Bleeding and Flushing and more, please visit my website: www PedrosGarage.com.
Happy Porsche’ing,
Ⓒ2015 Technolab / PedrosGarage.com