


Porsche leather is awesome ... but it can cost as much as the PCCB (Porsche Ceramic Composite Brakes).
My car was ordered with the "Full" leather package, which meant that my seats, dash and door panels were covered in leather, but that left many interior trim pieces finished in genuine cheap plastic.
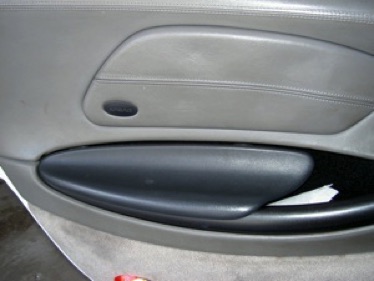
I took care of some of them by installing a Carbon Fibre Dash Kit, but some other pieces really bothered me, such as the lower center console, door armrests and the door pull covers among others.
Since these pieces were in contrasting color from my Graphite Gray interior, I decided to keep it that way.
Three of those pieces (the two armrests and the oddsment compartment lid are high-wear pieces, because our arms constantly rest and rub against them.
Therefore I chose to use two different types (thickness / grain) of leather.
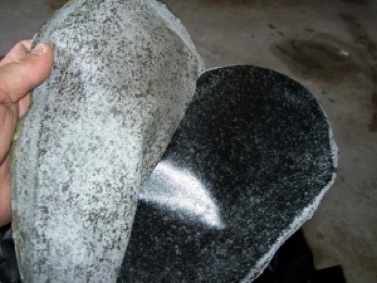
I found a Tandy Leather Store nearby and paid them a visit to see what they had available. I was pleasantly surprised to see the variety of hides in manyu, many colors, sizes, and grain pattern. I chose a thicker, corse grain cow hide and a very soft ans supple (thinner) buckskin.
The first step is to remove the pieces to be upholstered. The door arms come off with the removal of a simple pin, which acts as a hinge.
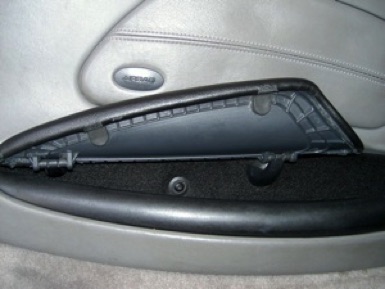
The oddsment compartment cover requires more disassembly and Torx bits, but it's not difficult either.
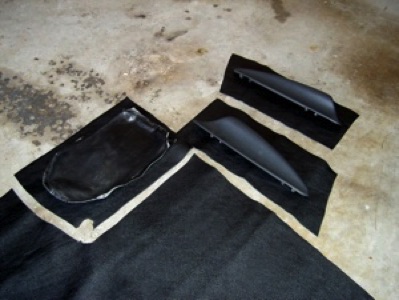
Once the pieces are out, you need to lay them over the hide and cut a rough patch of each.
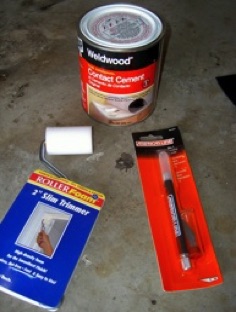
Aside from the leather hides you will also need:
• a can of contact cement
• a cheap applicator (foam brush)
• X-Acto knife
• scissors
• magic marker
• small rolling instrumrnt, such as a "D" battery or prescription pill container.
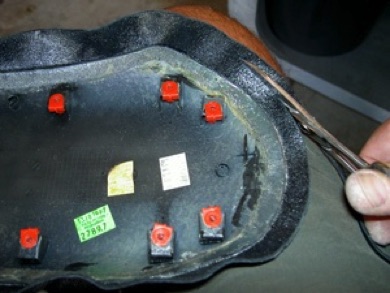
I started with the oddsment cover.
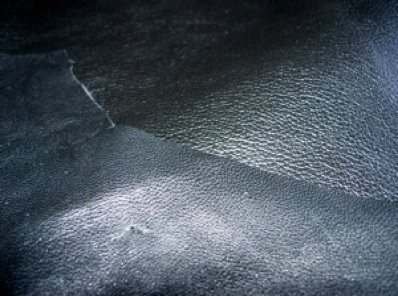
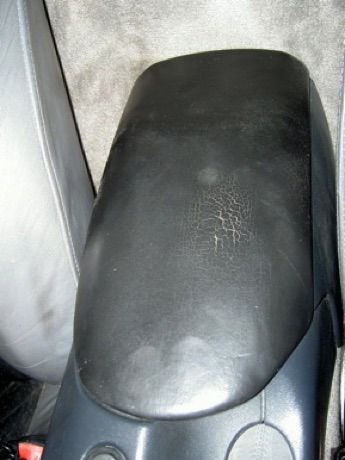
The 10 year old factory leather was worn, so I peeled it off.
Oddly, I found a second layer of leather on the cover. Seems as though the factory covered it twice!

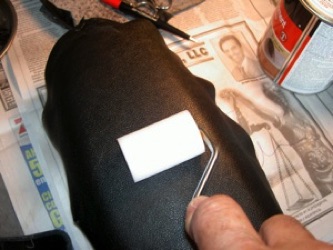
With the new piece of leather roughly cut to size, and the oddsment compartment cover peeled., I "painted" the underside of the piece of leather and the top of the cover completely with contact cement.
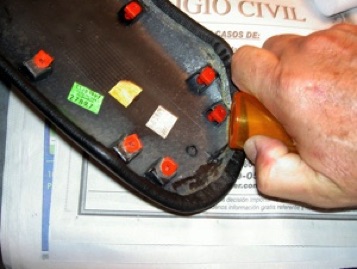
Once the contact cement had dried to the touch I laid the piece of leather over the center of the cover.
Workingfrom the center outward, I used a roller to completely bond both surfaces, making sure that there were no trapped air bubbles.
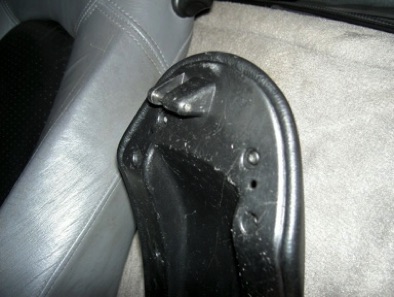
Then, I turned the piece upside down and again trimmed the leather, now enough for it to have about a 1/2 inch border, after the leather was folded over.
The curves of the oddsment compartment cover don't really require you to "V" notch the leather for a smooth transition.
I made sure to have an edge at least as wide as the leather completely "painted" with contact cement so when I foldded the leather over it would stick to the cover's underside.
Then, using an empty prescription bottle, I rolled and pressed the leather onto the underside as hard as I coud.
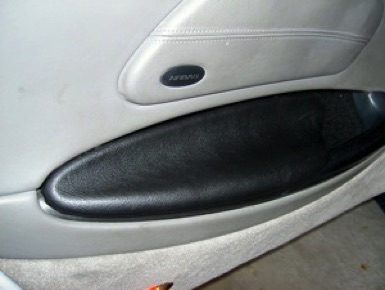
Finally, I screwed the undertray back in place, which also helps secue the edge of the folded-over leather and gives a "finished" look. In then installed it.
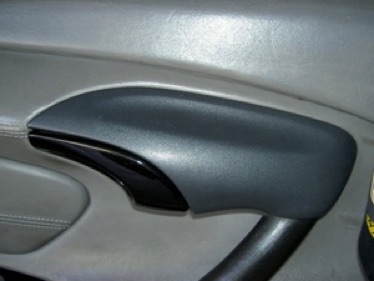
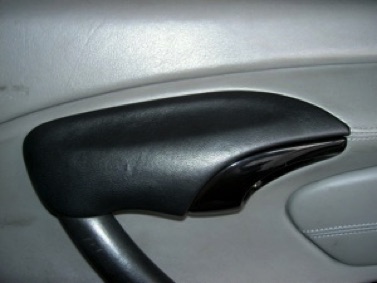
The same procedure was followed to cover the door armrests, but because some of the curves have a lesser radius and because there is no undertray, some "V" notches had to be cut into the leather's edge before it was folded over.
The next pieces were the door pull covers.
These also have some tight turns and curves and require some "V" notching as well, but since I used the thinner, more supple buckskin which stretches somewhat, many of the curves did not need the notching.
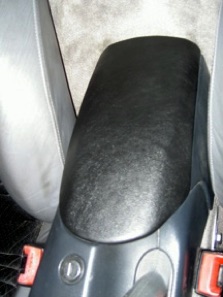
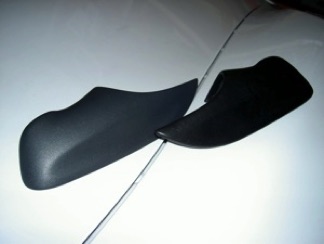
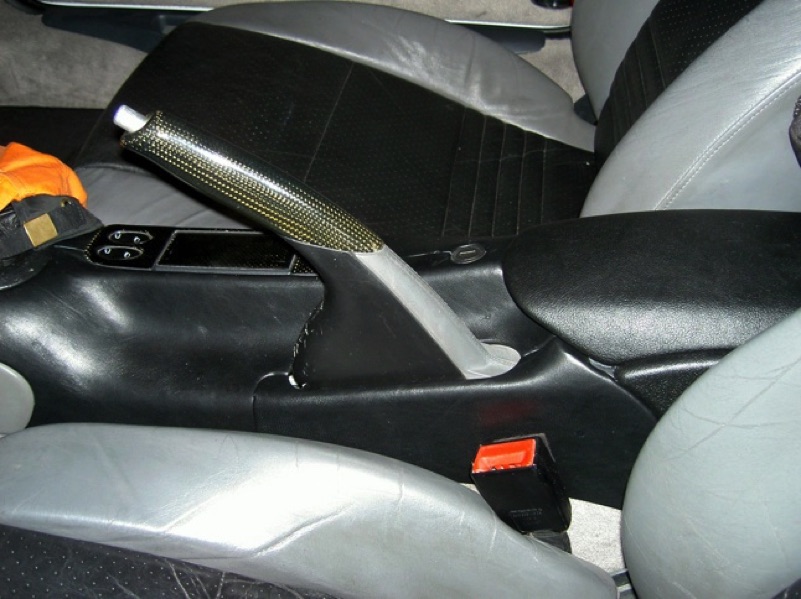
Below, you can see a before (left) and after (right) pictures which illustrate the rich look and feel of the upholstered piece.

The final piece was the most difficult because of the awkward shape and large size, lower center console.
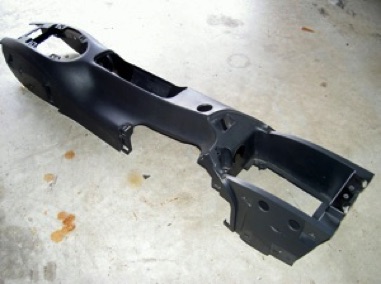
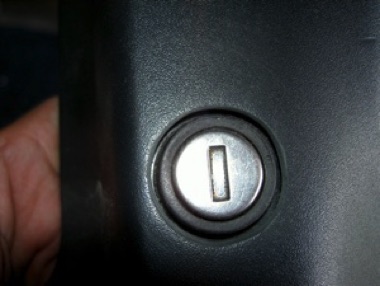
Before I started covering, I needed to enlarge the lock's hole, so that when it was covered with leather, the lock would fit through. I used a ream on a drill and finished with sandpaper.
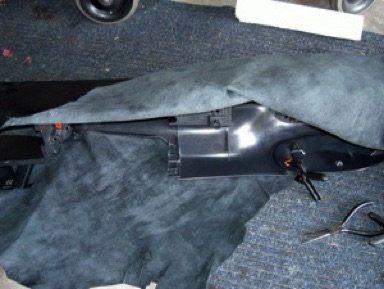
Because of its complex shape, I again took my time in aligning the piece and the leather patch. I also started joining the leather to the console's topmost surface first.
Slowly working outward while pulling a bit on the leather so that it would conform better with the sahape of the lower center console.
The final step was reinstalling the piece and going for a drive.
Happy Boxstering,

HACKS
Upholstering Interior
Trim Pieces in Leather