


Connect the open end of the “Y” fitting to the 3/4” heater hose. secure with hose clamps.
Thread the end of the hose to the inlet nipple of the newly installed center radiator, Cut hose to correct length and secure with hose clamps.
Use nylon tie-wraps to hold the new plumbing in place so that it doesn’t rub against the front tires when at full lock.
The other (return) side is done in the exact
manner.
Once all the plumbing is done, replace the
coolant drain plug and bottom panel.
Refill the system with the saved coolant or
mix new coolant if the coolant you collected
is not perfectly clear.
Because some coolant is lost and because
you have added extra hoses and a new
radiator, fresh coolant mix needs to be added.
Make 1/2 gallon of coolant mix by diluting
one quart of Porsche Coolant with one quart
of distilled water.
If this amount is not enough, mix another
1/2 gallon in the same manner.
You can use any coolant concentrate that's
phosphate and silicate freee and will generally
say "Good for all engines". The actual color
does not matter and can be mixed with other
color coolant.
When I started seriously AX’ing and DE’ing my car, and doing a hard, mountain Fun Runs at BRBS, my car’s coolant temperature would climb higher than what I was comfortable with, so I decided to install some extra cooling and thus added the 3rd (center) radiator. This extra radiator is standard on the “S”, on the 996/997s and on the GT3s.

The bolts and fasteners you can probably get heaper outside the dealer.
You will also need:
• 4-6 feet of 3/4” heater hose, which can be purchased at any auto parts store.
• 2 liters of Porsche Coolant or any coolant concentrate that's phosphate and silicate free.
• 2 “Y” fittings for 3/4” heater hose
• Hose Clamps for 3/4” heater hose
Raise the car on sturdy ramps or on a lift. You will need to have access under the car to drain the coolant.
Now remove the front wheel well liners. They are secured with various plastic rivets and fasteners. The plastic rivets can be removed without damage by pulling out the rivet head first, then the rivet.
Remove the front bumper skin:
Open the front trunk and unlock the four plastic retainers on the rubber trim edge by turning 90 degrees.
Remove the rubber trim edge.
Remove the bumper side markers by bulling the rearmost part of the side marker out.
Remove the screws securing the bumper skin. Two screws are hidden by the wheel well shrouds.
Pull the bumper skin off the car.
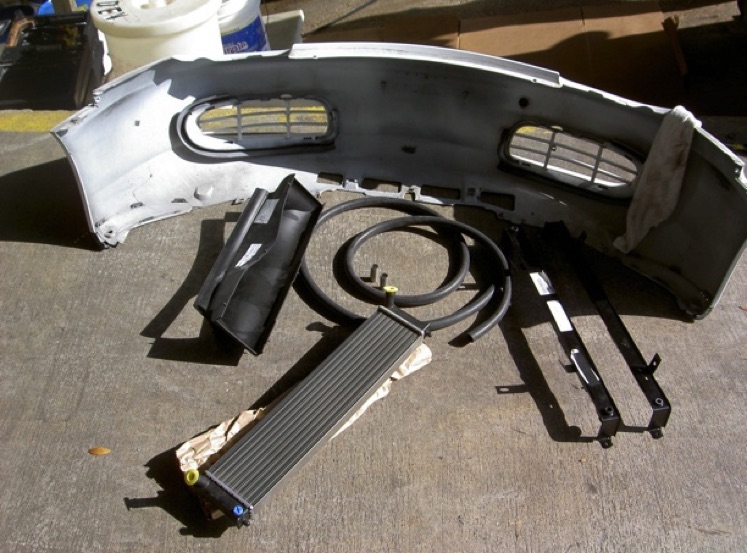
The Boxster already has the mounting supports for the center radiator from the factory, so it’s a simple matter of mounting the new radiator as shown on the parts diagram above.
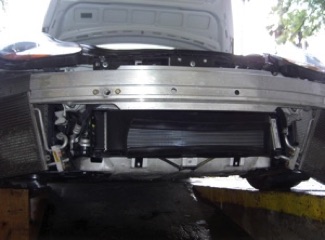
It’s important that the rubber air duct be installed correctly, so that it seals around the radiator and also against the front bumper skin when it gets it gets replaced. Since this radiator has no fans, it only cools when air is forced through it.
If there are leaks, cooling will be reduced.
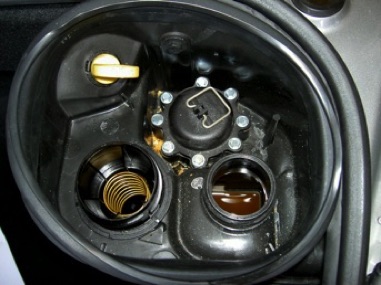
Coolant now needs to be drained. Remove the rearmost bottom under panel. Make sure the car’s engine is cold. Remove coolant reservoir cap (blue in color, located in the rear trunk).
Place a 5-gallon bucket under the coolant drain plug.
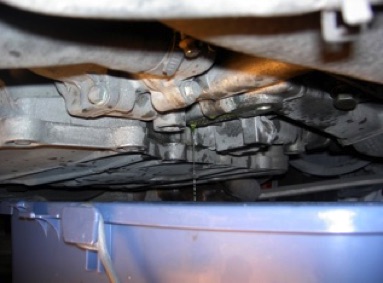
Coolant is poisonous to humans and pets. Take all necessary precautions.
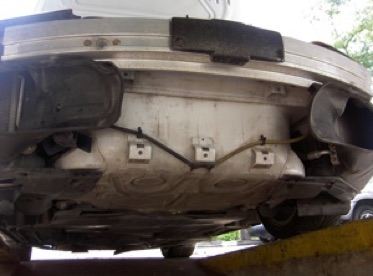
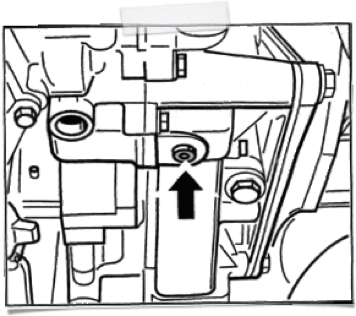
Loosen the coolant drain plug located on the coolant manifold, indicated with an arrow (above) and collect for re-use. You don’t need to get every single drop of coolant, because all you need is for the forward coolant hoses to be empty so you don’t create coolant spills.
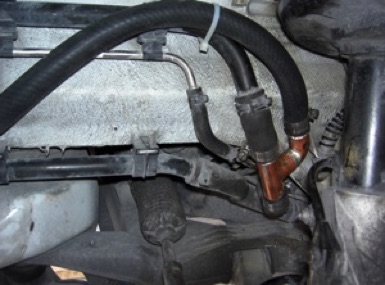
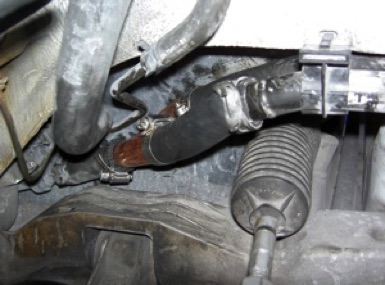
Locate the main coolant feed line and main coolant return line for the front radiators.
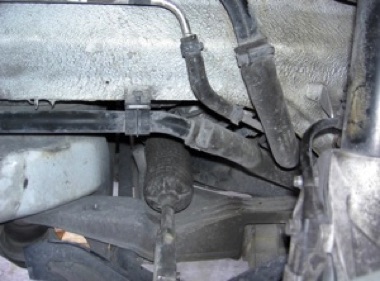
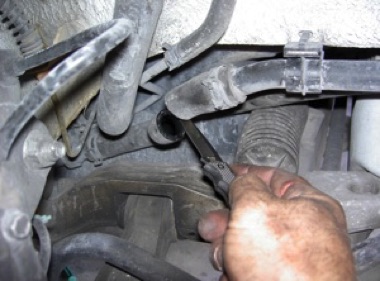

As their names indicate, these are the lines that feed and return coolant from the radiators. You will need to cut these lines and insert the 3/4” “Y” fittings.
In the bottom pictures you can see how I installed my “Y” fittings. Because the dealer didn’t have the correct fittings in stock, and since I didn’t want to wait for them to order the parts, I manufactured my own “Y” fittings from copper plumbing fittings.
The cooling system now needs to be bled. In my opinion, this is one of the most important
steps for the longevity of your coolant reservoir.
1. Remove both caps (oil and coolant).
2. Lift cover off with a spatula.
3. Lift bow on bleeder valve.
4. Screw oil cap on again
5. On Tiptronic vehicles, the pneumatically
triggered coolant shutoff valve (flat-seat
valve) must be opened for the bleeding
process. The electric switch-over valve
must be switched off for this purpose.
Triggering can be performed with the
Porsche System Tester 2 or by pulling
out the Tiptronic control module fuse B-1
with the ignition switched off.
6. Check whether the coolant shutoff valve is open.
7. Fill with coolant up to the bottom edge of the filler neck.
8. Run the engine at idle speed and top up with coolant until no more coolant flows into the cooling system when the engine is revved moderately. (Coolant level now at lies lower edge of filler neck.) The coolant temperature must not exceed 80°C; proceed directly to the next work step if necessary.
9. Close reservoir and warm engine up to operating temperature at a speed of -2500 rpm until the thermostat opens after approx. 10 minutes (coolant temperature -90°C).
Check: The radiator supply lines and return lines in the front wheel housings must be hot.
10. Allow engine to run an additional 5 minutes at ~ 2500 rpm. Every 30 seconds, briefly rev up the engine to -5000 rpm. RPM surges are important for proper bleeding.
Note I
The level Warning light can light up during the bleeding process (reset by restarting the engine). Interrupt the procedure if the coolant level is below the "MIN" mark. Open reservoir with extreme caution and allow over pressure to escape until the coolant level reaches the lower edge of the filler neck; top up with coolant if
necessary. Again intermittently rev the engine for 5 minutes.
11. Allow engine to run at idle speed until any activated radiator fans switch off again. Then switch off the engine. Open reservoir cap with extreme caution until the reservoir is de-pressurized (danger of scalding!).
12. Top up coolant expansion tank until level reaches lower edge of filler neck.
13. Reposition bow on bleeder shutoff valve, Unscrew oil cap.
14. Put on cover and body seal. Screw on both caps.
15. Reactivate ATF shut-off valve on Tiptronic vehicles.
Now that the system is working, reinstall the front bumper skin. You will need to remove it once more, so you don’t need to use all the fasteners at this time.
Replace both wheel well liners.
Now you need to allow air into the radiator.
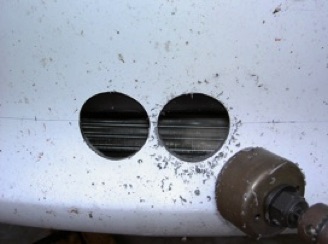
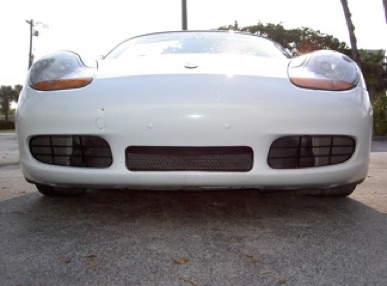
Using a grease pencil, draw a straight line between the center of the two side air intakes, running down the “deepest” part of the curve.
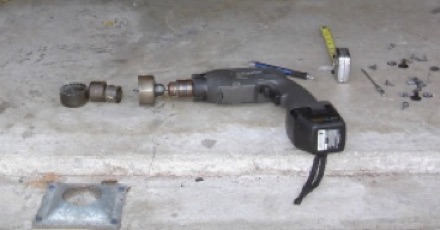
Mark of the center point. Using a 2” circular saw cut bit, cut the first hole in the center of the bumper skin.
After the center hole has been cut, cut three more holes on each side of the center hole (total of 7 holes) with a separation of about 1/4”.
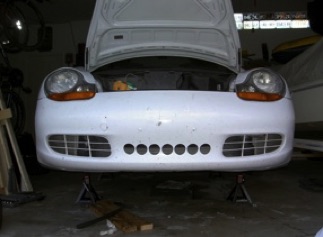
At this point I went for a test ride, but you can go to the next step if you want.
Measure the distance from the top and bottom edges of the holes to the inside edge of the rubber Air Duct.
Measure the distance from the outside edge of the right-most and left-most holes to the inside edge of the Air Duct. This will give you the dimensions for the size of the template for the final opening. You may want to subtract 1/2 inch from the height and from the width to give the Air Duct a bit more support.
With these dimensions, cut a template from a piece of plastic or sturdy cardboard.
Round off the corners according to your preference.
I used one of the bumper skin cut-outs as a the radius for my corners.
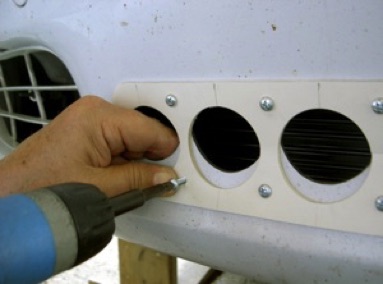
Now, center this template according to the position of the rubber Air Duct. As you can see in my pictures, the position of the template will be about 1/2” lower than the cut-outs.
You can now screw the template in place using self-tapping screws.
Use as many screws as needed to force the template to the contours of the bumper skin.
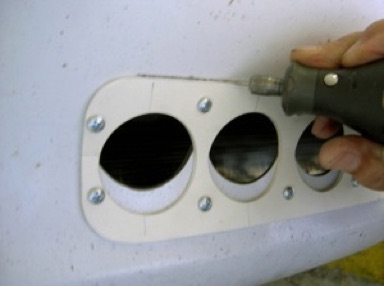
Using a cutting bit on a Dremel, cut around the template.
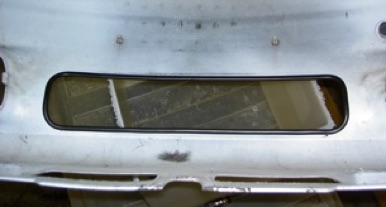
Remove the bumper skin for the last time.
Finish off the cut-out with some sandpaper.
Place a strip of door trim edging around the inside edge of the cutout.
You can use a matching or a contrasting edge color. I chose to use black trim on my Glacier White car.
This door trim has an adhesive inside which will hold it securely in place. Initially cut it a little long. Start at the top center and push into place.
Trim the last piece 1/8” longer than needed and force into place. This will help secure it in place.
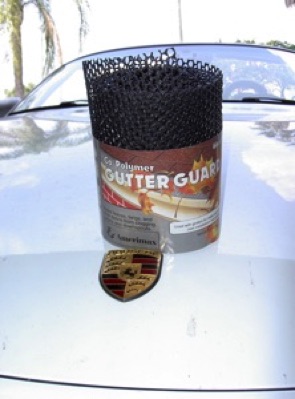
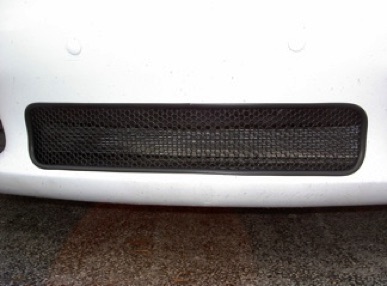
You can leave the new opening as is, but because this leaves the center radiator very vulnerable to road debris, I chose to protect it with a mesh. I chose plastic Gutter Guard, found at any home improvement center. It comes in black, but you can also paint it using spray paint for plastic, available in many colors at the same
home improvement center.
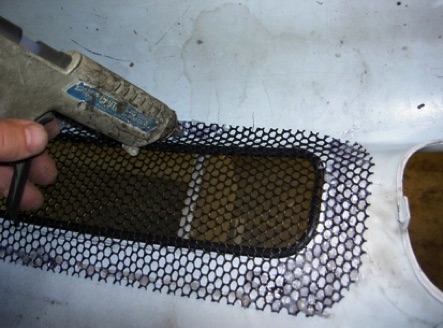
Cut a piece about 3 inches wider and higher than the cut-out. Working from the inside of the bumper skin, hot-glue it in place. Use plenty of hot glue to secure the mesh. To ensure good adhesion, scratch into the plastic around the cutout.
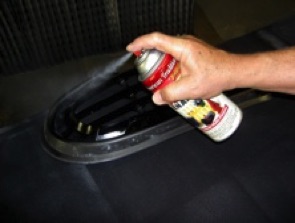
Now may be a good time to re-paint the side air intake grills. Remove them from the bumper skin (they snap into place) clean and sand the grills and spray-paint with the same paint for plastic. Replace.
Now you can replace the bumper skin for the last time. Go for a drive and enjoy!
Happy Boxstering,

HACKS
Install Center Radiator
and Coolant System Bleeding
First you need to get the parts from your dealer.
1.- Radiator (996.106.037.51)
2.- Retaining Frame (996.504.487.02)
3.- Retaining Frame (996.504.485.02)
4.- Rubber Mounting (930.113.430.00) Q=2
5.- Hex Head Bolt M6 x 12 (900.378.036.09)
6.- Speed Nut M6 (999.507.550.02)
7.- Hex Head Bolt M8 x 16 (900.378.074.09)
8.- Speed Nut M8 (999.951.869.02)
9.- Air Duct (996.575.141.02)
10.- Screw Plug (996.106.901.00)